
Referred by a family member, I have opted a local brand of soundproofing material called Mohawk (MD Full Kit) after being convinced it has the quality comparable to that of Dynamat but retailed at a cheaper price.

Priced at RM480 per box of 10 sheets, I bought two boxes. Each box weighs approximately 18kg.

The day started off by stripping the inside door panels to have access to the inside skin of the door.

The plastic protecting the electronics from rainwater were stripped off, while the speakers and power window instruments were disconnected from its wires.

Small strips of the material were inserted separately due to the limited access into the door caused by the power window mechanism. Removing the complicated mechanism seems risky, thus avoided.

To reduce vibration between the plastic and metal parts of the door, small strips of soundproofing material were placed at areas where contact is most possible (highest points). The same was done on all four doors and the boot. This dampened the vibration on the doors significantly, eliminated the 'tin kosong' noise, and reduced the panel vibration emitted from the speakers.
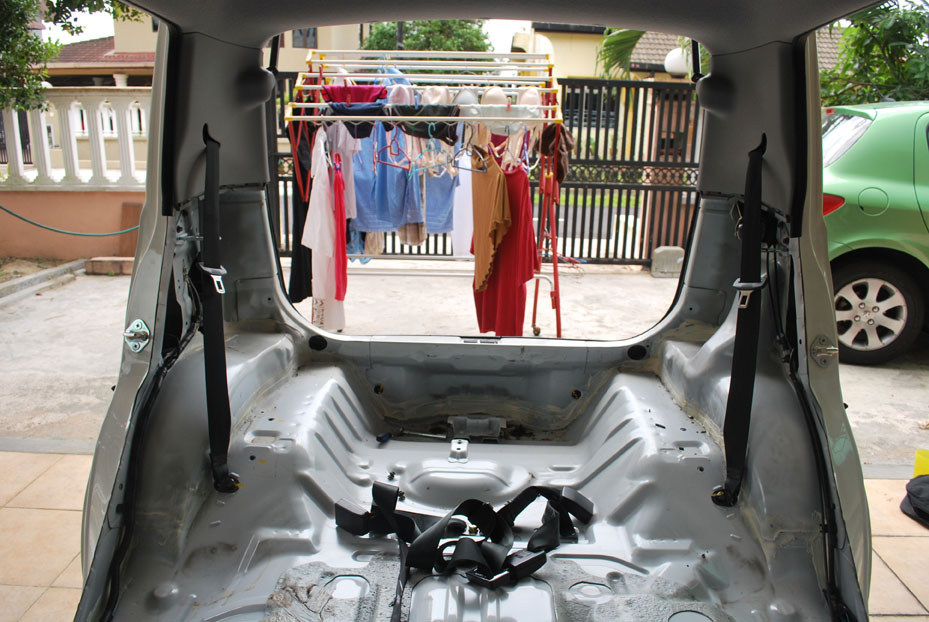
Done with the doors, the rear section of the cabin was stripped with ease.

Being a cheap and cheerful auto, Perodua had not bothered to stick any sound dampening material to the bare metal.

With an abundant of material left, we decided to Mohawk the whole rear part of the cabin. As a result, road noise from the rear end was significantly reduced.

The mid rear to front of the cabin is covered with a thick carpet as stock, which helps dampen road noise.

However this along with the placement of stock sound deadening materials (light grey) on some parts of the metal is insufficient.

The material was applied to the bare parts of the floor. It is important to cover the holes to avoid noise from entering the cabin. Precautions were made during application to ensure wires do not end up being buried underneath the material.

The car feels significantly quieter after having applied sound deadening materials on all four doors, the inside cabin, and the boot of the car. The experience of being in the car is quieter, therefore much more comfortable and feels comparable to the cabin of an imported car. My 'normal' volume for the radio is tuned down several notches and a conversation between passengers is possible without the need to raise one's voice while travelling at higher speed.
I would like to thank my father who led and suggested this 'summer project', furthermore for having sacrificed blood and sweat into making my car much quieter. Overall, I am satisfied with the results brought by the materials applied and therefore would recommend it to the owners of Perodua Vivas out there.
hi. nice DIY here. is it hard to dissemble the back seat and the front seat? mind to tell me the step on how to do it? owh, one more, do u know how to remove the roof mat? planning to do sp at the roof. tqvm.
ReplyDeleteHi, thanks
ReplyDeleteIt is not a challenge to remove the seats at all, as there are only several bolts holding them down. All you have to do is unscrew the bolts and everything comes out without a hassle. Be careful with the driver's seat though, as you have to disconnect the seat belt warning sensor (black wire underneath the seat) before you take the seat out.
The roof mat is an area which I havent had time to take apart as it requires gluing back the center part. Usually the panels are assembled by 'snap-on' plastic bits or bolts but in case of the roof you will have to deal with some glue. You will have to cut the glue patches (i think it is silicone based) in order to detach the roof carpet and re-apply glue later after having applied some sound-deadening materials.
All the best in your progress :)
Nice work~
ReplyDeletei'm thinking about doing this myself now...
just, how long did it take you to do the whole thing?
and the budget?
any suggestion for someone with a bit of tight budget and some time to spare?
Hello there, sorry for the uberlate reply I hardly check on this blog, I should maybe write more. The whole thing took my dad and I 2 days (1 day for the doors and boot whereas another day for the floor).
DeleteThe budget is Rm1000. You can go for cheaper brands out there but I heard that they tend to melt and stuff hence why Mohawk was recommended to me by several people. If your budget allows, why not go for Dynamat. My uncle spent Rm6k on Dynamat (only materials) in soundproofing his Nissan Navara. I have to say, it made the truck feels very non-industrial as it cuts out the diesel engine noise.
Make sure you have a weekend to spare and do it one bit at a time since at first you may feel a little scared peeling things off your car. Just be careful especially going around the power window gaps cos your hand will mostly get cuts. Happy soundproofing :)
Thanks for this article. I'm in the process of doing this too.. I have a viva as well.. I hope that you can help me a little. how did you remove that round flat plastic button holding the carpet under the dashboard? Thanks :)
ReplyDeleteHi Just Ju,
DeleteI can help you from here :) as for the plastic buttons, you will have to unscrew it... once it feels very much loose you have to pull it out with a little bit of force.
:)
WOW.. Great work. Salute!!!! Im trying to DIY too.
ReplyDeleteThis comment has been removed by the author.
ReplyDeleteI always curious to know more about how we can enhance our skill, how we can improve our portfolio to add some attractive certificate. I got some valuable points through this blog. Soundproofing
ReplyDelete